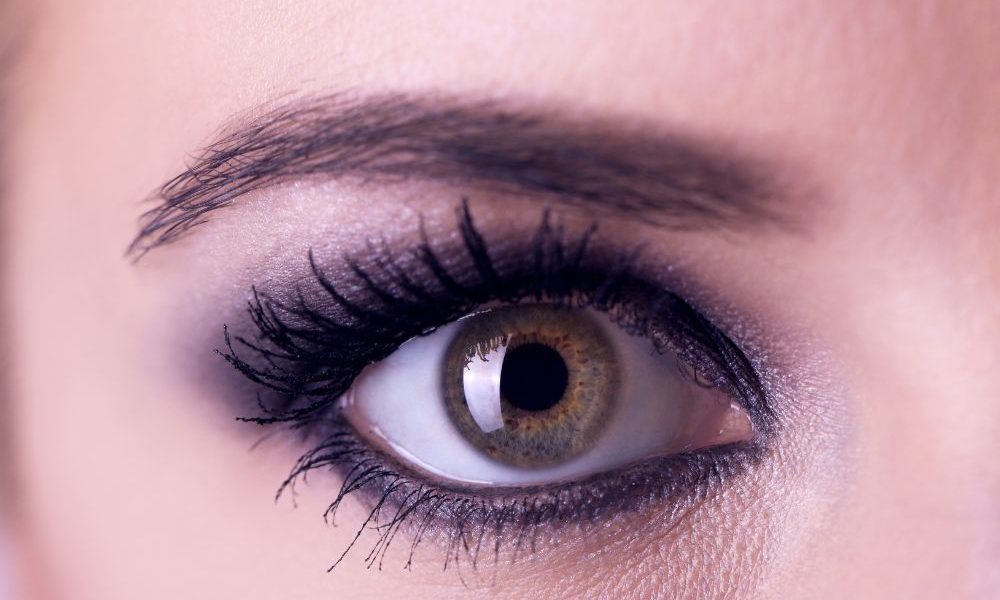
The smoky eye is a classic makeup look that never goes out of style. It’s sultry, sophisticated, and can elevate any makeup look from basic to glamorous. The best part? It’s easier to achieve than you might think, even for beginners. With the right tools and techniques, you can master the smoky eye and feel confident wearing it to any event. Here’s a step-by-step guide to help you create the perfect smoky eye look.
Step 1: Gather Your Tools and Products
Before you start, make sure you have all the necessary tools and products:
- Eyeshadow primer
- Eyeshadow palette (with light, medium, and dark shades)
- Eyeliner (pencil, gel, or liquid)
- Mascara
- Blending brush
- Smudge brush
- Flat eyeshadow brush
Why These Tools Matter
As Mario Dedivanovic, a renowned makeup artist, advises, “The secret to a long-lasting smoky eye is to use an eyeshadow primer. This will help to keep your eyeshadow in place and prevent creasing” (Source: Mario Dedivanovic Masterclass). This step ensures that your smoky eye stays put all day or night without smudging or fading.
Step 2: Prime Your Eyelids
Start with a clean, moisturized face. Apply an eyeshadow primer to your eyelids to create a smooth base for your eyeshadow. This helps the colors appear more vibrant and prevents them from creasing.
Personal Anecdote
When I first started experimenting with smoky eyes, I skipped the primer step, thinking it wasn’t necessary. My eyeshadow would always crease and fade halfway through the day. Once I started using a primer, the difference was like night and day. My smoky eye stayed flawless from morning until night.
Step 3: Apply a Base Shade
Using a flat eyeshadow brush, apply a light, neutral shade all over your eyelid. This base color will help the darker shades blend more easily and create a seamless look.
Step 4: Define the Crease
Next, use a medium-toned shade to define your crease. Choose a color that’s slightly darker than your skin tone. Blend it into the crease of your eye using a blending brush, using windshield wiper motions to soften any harsh lines.
Expert Insight
Lisa Potter-Dixon, a makeup artist, suggests, “A smoky eye doesn’t have to be complicated. Start with a single shade of eyeshadow and blend it into the crease of your eye. Then, use a slightly darker shade to line your upper and lower lash lines and smudge it out for a smoky effect” (Source: “Makeup Manual” by Lisa Potter-Dixon).
Step 5: Add Depth with a Darker Shade
Now it’s time to add depth. Choose a dark eyeshadow shade like black, dark brown, or deep gray. Apply this shade to the outer corner of your eyelid and blend it into the crease. The key to a perfect smoky eye is blending, so take your time to ensure there are no harsh lines.
I used to rush through blending, thinking it wouldn’t make much difference. However, once I spent more time blending, my smoky eyes looked much more professional and polished.
Step 6: Line Your Eyes
Line your upper lash line with a dark eyeliner. You can use a pencil, gel, or liquid liner, depending on your preference. Start from the inner corner and work your way out, creating a thicker line as you reach the outer corner.
Expert Insight
Huda Kattan, makeup artist and founder of Huda Beauty, says, “Don’t be afraid of dark colors. The smoky eye is all about creating depth and dimension, and you can achieve that with any shade, from black to brown to even deep purple or green” (Source: Huda Beauty’s “Smokey Eye 101” Blog Post).
Step 7: Smudge for Smokiness
Using a smudge brush, gently smudge the eyeliner to soften the line and create a smoky effect. You can also apply a bit of the dark eyeshadow over the liner for extra intensity.
Step 8: Highlight the Inner Corners and Brow Bone
To make your eyes pop, apply a shimmery or light shade to the inner corners of your eyes and the brow bone. This adds a touch of brightness and balances the dark colors of the smoky eye.
Step 9: Apply Mascara
Finish the look with a few coats of mascara on your upper and lower lashes. This adds volume and length, making your eyes look bigger and more defined.
Expert Insight
Patrick Ta, a celebrity makeup artist, advises, “Wiggling the mascara wand at the base of your lashes and then pulling it through to the tips is a great technique for achieving both volume and length. It also helps to prevent clumping” (Source: Violet Grey).
Step 10: Optional – False Lashes
If you want to take your smoky eye to the next level, apply false lashes. They add extra drama and make your eyes stand out even more.
Unique Studies
A study published in the International Journal of Cosmetic Science in 2018 found that smoky eye makeup can significantly enhance the perceived attractiveness of the eyes, making them appear larger and more alluring. This effect can be achieved with various colors and techniques, making the smoky eye a versatile look for different occasions.
Tips for Different Eye Shapes
Almond Eyes
If you have almond-shaped eyes, consider yourself lucky because almost any eyeliner style suits you. For a classic winged liner, start thin at the inner corner and gradually thicken the line as you move outwards. This enhances the natural shape of your eyes.
Round Eyes
For round eyes, aim to elongate the eye by focusing on the outer corners. Apply eyeliner from the middle of your lash line to the outer edge, creating a slight wing. This gives the illusion of a more elongated eye shape.
Hooded Eyes
Hooded eyes can benefit from tightlining, which involves applying eyeliner to the upper waterline. This technique makes your lashes look fuller without taking up lid space. You can then add a thin line to the outer half of your lash line for a subtle winged effect.
Deep-Set Eyes
For deep-set eyes, keep the eyeliner close to the lash line to avoid making your eyes appear sunken. A thin line with a slight flick at the outer corner can help lift and open up your eyes.
Small Eyes
If you have small eyes, avoid lining the entire eye with dark eyeliner as it can make them appear smaller. Instead, line the outer third of your upper and lower lash lines to open up your eyes and create the illusion of larger eyes.
Close-Set Eyes
For close-set eyes, focus on the outer corners to draw attention away from the inner corners. Apply eyeliner to the outer half of your lash line and extend it outwards. This creates the illusion of wider-set eyes.
Wide-Set Eyes
Wide-set eyes can benefit from lining the entire upper lash line to draw attention to the center of the face. Avoid extending the liner too far outwards, as this can emphasize the width between your eyes.
Conclusion
Creating a smoky eye look may seem intimidating at first, but with practice and the right techniques, anyone can master it. Remember, the key to a perfect smoky eye is blending, patience, and confidence. Don’t be afraid to experiment with different colors and styles to find what works best for you. Whether you’re going for a subtle daytime look or a dramatic evening look, the smoky eye is a versatile and timeless choice that can enhance your natural beauty and make your eyes stand out. So grab your brushes and eyeshadows, and get ready to create a sultry smoky eye that will turn heads wherever you go.


