Perfectly shaped and tinted brows can frame your face beautifully and elevate your overall look. While professional services are available, achieving stunning brows at home is entirely possible with the right tools and techniques. This comprehensive guide will walk you through everything you need to know about DIY brow shaping and tinting, ensuring you can enjoy flawless brows every day.
Understanding Your Brow Shape
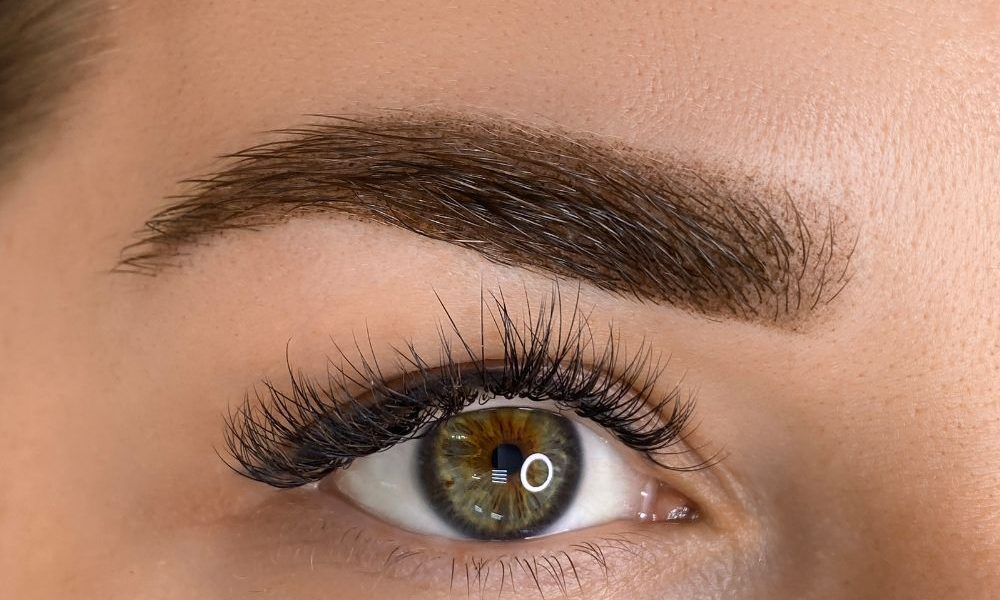
The first step in achieving perfect brows is understanding your natural brow shape. Jared Bailey, Benefit Cosmetics Global Brow Expert, says, “Brow shaping is an art, not a science. It’s about enhancing your natural brow shape and finding a look that complements your facial features” (Source: Benefit Cosmetics). Start by identifying your brow shape and considering how it fits with your face.
Finding Your Natural Brow Shape
- Identify the Starting Point: Hold a makeup brush vertically along the side of your nose. Where the brush meets your brow is where your brow should start.
- Mark the Arch: Angle the brush from the side of your nose through the center of your pupil. This is where your arch should be.
- Determine the End Point: Angle the brush from the side of your nose to the outer corner of your eye. This is where your brow should end.
Personal Anecdote
When I first started shaping my brows, I was overwhelmed by the numerous tutorials and different styles. But after following these simple steps, I found the shape that suited my face perfectly. It made a world of difference in how polished and put-together I looked.
Tools You’ll Need
Having the right tools is essential for precise brow shaping and tinting. Here’s what you’ll need:
- Tweezers
- Small scissors
- Brow pencil
- Brow brush or spoolie
- Brow tinting kit
- Cotton swabs
Step-by-Step Guide to Brow Shaping
1. Brush Your Brows
Start by brushing your brows upward with a spoolie or brow brush. This helps you see their natural shape and identify any stray hairs.
2. Tweeze Stray Hairs
Using tweezers, pluck any stray hairs that fall outside your natural brow shape. Be careful not to overpluck, as this can lead to uneven or overly thin brows. Sania Vucetaj, Brow Expert and Founder of Sania’s Brow Bar, advises, “The key to perfect brows is finding the right balance between definition and naturalness. Don’t overpluck or overfill, and always use a light hand when applying makeup” (Source: Sania’s Brow Bar).
3. Trim Excess Length
Using small scissors, trim any long brow hairs that stick out. Brush your brows upward again and trim along the top edge to keep them neat.
4. Define Your Brows
With a brow pencil, lightly fill in any sparse areas. Follow the natural direction of your hair growth and use small, hair-like strokes for a natural look.
Step-by-Step Guide to Brow Tinting
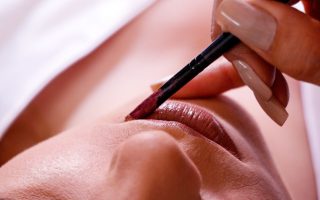
Tinting your brows can add depth and definition, making them look fuller and more polished. Here’s how to do it at home:
1. Choose the Right Tint
Selecting the right shade is crucial. Tonya Crooks, Celebrity Brow Artist, says, “Brow tinting can be a great way to add depth and definition to your brows, but it’s important to choose the right shade and formula for your skin tone and hair color” (Source: The Brow Gal).
2. Prepare Your Brows
Clean your brows thoroughly to remove any makeup or oils. Brush them into shape with a spoolie.
3. Apply the Tint
Follow the instructions on your brow tinting kit. Generally, you’ll need to mix the tint and developer, then apply it to your brows with the applicator provided. Be careful to stay within your brow lines to avoid staining your skin.
4. Wait and Remove
Leave the tint on for the recommended time, usually around 5-10 minutes. Wipe off the tint with a damp cotton pad or cotton swab. Repeat if a darker shade is desired, but be cautious not to overdo it.
Personal Anecdote
I was hesitant to try brow tinting at home, but after following these steps, I was amazed at how easy and effective it was. My brows looked naturally fuller and more defined, saving me time on my daily makeup routine.
Maintenance Tips for Perfect Brows
Maintaining your brows is just as important as shaping and tinting them. Regular care will keep them looking their best.
1. Tweeze Stray Hairs Regularly
To keep your brows in shape, tweeze any stray hairs as they grow back. This will prevent your brows from becoming unruly and maintain their defined shape. Damone Roberts, Celebrity Brow Artist, emphasizes the importance of maintenance: “Tweeze stray hairs regularly, brush your brows daily, and schedule regular professional shaping appointments to maintain your desired shape” (Source: Damone Roberts Beverly Hills).
2. Brush Daily
Brushing your brows daily with a spoolie keeps them neat and helps distribute natural oils, promoting healthy growth.
3. Moisturize Your Brows
Just like your skin, your brows need moisture to stay healthy. Apply a bit of brow conditioner or natural oil (like castor oil) to keep them hydrated and promote growth.
Unique Studies on Brows
The Impact of Eyebrow Shape on Facial Attractiveness
A study published in Aesthetic Plastic Surgery in 2017 found that thicker, more defined brows are generally perceived as more attractive than thinner, less defined brows. This highlights the importance of well-groomed brows in enhancing facial attractiveness.
The Role of Eyebrows in Facial Expression and Emotion Recognition
A study from the Journal of Nonverbal Behavior in 2014 examined the role of eyebrows in conveying emotions and facial expressions. The results show that eyebrows play a crucial role in nonverbal communication and can significantly impact how we perceive others’ emotions.
DIY Tips for Perfect Brows
1. Use a Brow Stencil
If you’re unsure about shaping your brows freehand, a brow stencil can be a helpful guide. Place the stencil over your brow and use a brow pencil to trace the shape. Then tweeze any hairs outside the lines.
2. Highlight Your Brow Bone
Applying a highlighter just below your brow bone can accentuate your arch and make your eyes look more lifted. Choose a shade that complements your skin tone for a natural glow.
3. Set Your Brows
After shaping and filling in your brows, use a brow gel to set them in place. This will keep them looking neat and defined all day.
Personal Anecdote
One of my favorite brow tricks is using a tiny bit of clear lip balm to tame any stray brow hairs. It’s a quick fix that keeps my brows looking polished without any extra products.
Conclusion
Achieving perfect brows at home is entirely possible with the right tools and techniques. By understanding your natural brow shape, using the right products, and following a regular maintenance routine, you can enjoy beautifully shaped and tinted brows every day. Remember, the key to perfect brows is finding a balance between definition and naturalness, and always working with your unique features.
With practice and patience, you’ll be able to master the art of brow shaping and tinting, giving you the confidence to rock your best brows every day. So go ahead, give these tips a try, and enjoy the satisfaction of having perfectly groomed brows that frame your face and enhance your natural beauty.